
Most people think car interiors are set in stone, something you’re stuck with until you trade in. But just like a living room or bedroom, your car’s interior can be upgraded, refreshed, and tailored to your needs without tearing apart the dashboard or voiding your warranty. Whether you’re looking to replace worn upholstery, add better storage, or simply inject some personality into a bland cabin, there are dozens of accessible DIY projects that improve both aesthetics and daily usability. This guide walks through the foundational elements of interior car design and the practical upgrades anyone can tackle in a weekend.
Table of Contents
ToggleKey Takeaways
- Interior car design focuses on three core elements—materials, layout, and lighting—allowing you to personalize your cabin through surface treatments and accessories without structural changes.
- High-impact upgrades like steering wheel covers, floor mats, ambient LED lighting, and seat organizers can transform your vehicle’s interior in just a few hours with basic hand tools.
- Choose a neutral dominant color with one accent color (appearing in 10–15% of visible surfaces) to create a cohesive interior design that feels intentional and ages well for resale.
- Prioritize comfort and functionality alongside aesthetics by upgrading cushions, improving airflow, reducing noise, and adding storage—factors that determine daily enjoyment of your space.
- Always verify compatibility with safety features like airbags, test materials under your vehicle’s lighting conditions, and perform thorough surface prep before applying dyes, wraps, or adhesives.
Understanding the Basics of Interior Car Design
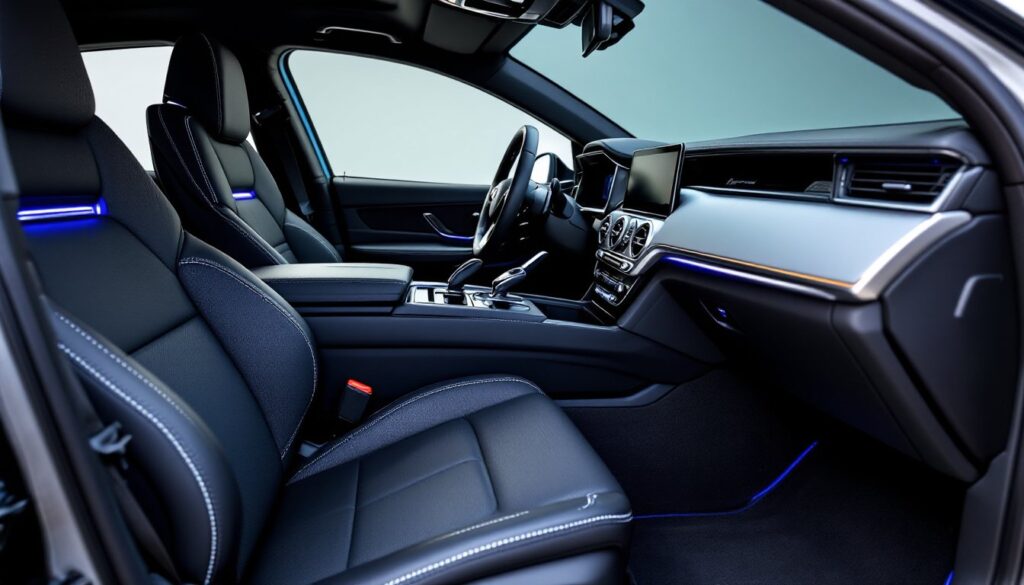
Car interior design boils down to three things: materials, layout, and lighting. Unlike home design where you can move walls or swap furniture, a vehicle’s structure is fixed. You’re working within a defined footprint, typically 80–120 cubic feet of passenger volume, depending on the model, and everything you add or change has to coexist with OEM (original equipment manufacturer) components like airbags, mounting points, and wiring harnesses.
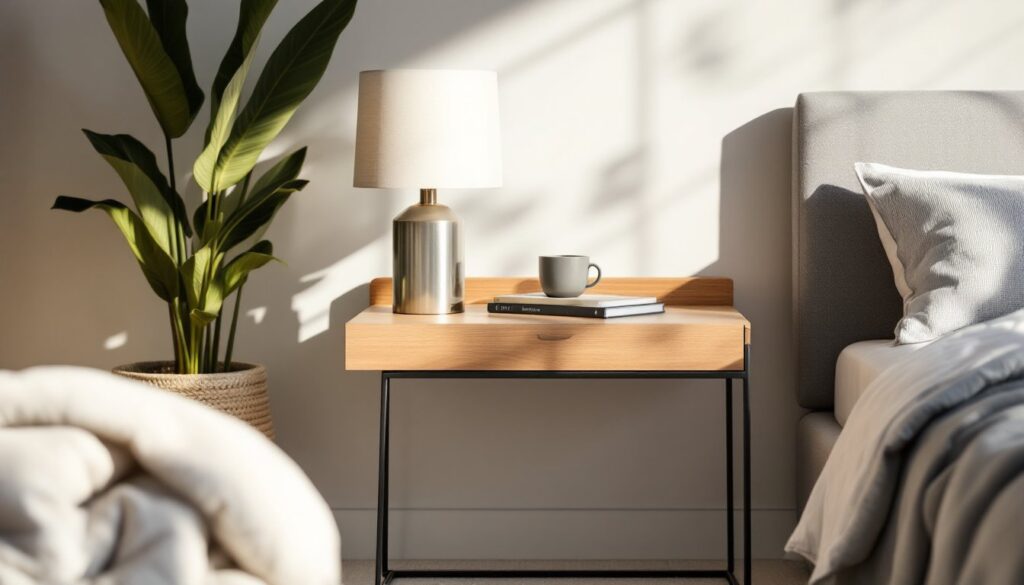
The layout is non-negotiable: seats, steering wheel, console, and door panels are positioned by the manufacturer. Your design freedom comes from surface treatments, accent pieces, and accessories that layer onto that skeleton. This is why upholstery, trim inserts, and floor mats have such a big visual impact, they’re the largest uninterrupted surfaces in the cabin.
Lighting is often overlooked but plays a huge role in ambiance. Factory interiors typically use cool-white LEDs or incandescents in overhead and footwell positions. Adding RGB LED strips under seats or in door pockets can shift the mood, but keep brightness low to avoid distraction while driving. Always check your state’s regulations on interior lighting color and visibility, some jurisdictions restrict red or blue hues that could be confused with emergency vehicles.
Finally, consider ergonomics. A great interior isn’t just stylish: it puts controls, cup holders, and charging ports within easy reach. Before you add a new center console organizer or armrest cover, sit in the driver’s seat and make sure it doesn’t interfere with shifter movement, emergency brake access, or HVAC vents.
Essential Elements That Define Your Car’s Interior
Every car interior is a mix of structural components (dash, door frames, headliner) and soft goods (seats, carpets, trim panels). The latter is where you have the most latitude for change.
Seats are the dominant visual element. Factory seats range from cloth to vinyl to leather, with stitch patterns, bolstering, and perforations varying by trim level. Replacing seat covers is the most common cosmetic upgrade, but fit matters, universal covers rarely hug contours the way model-specific covers do, and loose fabric can interfere with side-impact airbags. If your seats have side airbags (check the “SRS Airbag” tag on the seatback), only use covers explicitly rated for airbag compatibility.
Dashboard and door panels are usually molded plastic or vinyl. You can’t easily replace these without disassembly, but vinyl wrap, trim inserts, and bezel overlays let you change color or texture without removing parts. Carbon-fiber-look vinyl is popular, but it’s worth noting that real carbon fiber is a structural composite, decorative versions are just printed plastic.
Flooring consists of molded carpet over sound-deadening material. Factory carpet is typically nylon loop or cut-pile, around 16–24 oz per square yard. Upgrading to all-weather floor liners (3D-molded TPE or rubber) protects against mud, snow, and spills. They’re not as plush underfoot, but they’re dishwasher-safe and won’t harbor mold.
Materials and Textures
Texture variety keeps an interior from feeling flat. Mixing smooth leather or leatherette with perforated inserts adds visual interest and improves breathability in hot climates. Alcantara, a synthetic suede, offers grip and a premium look but shows oils and dirt quickly: it’s best reserved for steering wheels and shift knobs that you’ll clean regularly.
Plastic trim comes in gloss, matte, and textured finishes. Gloss (“piano black”) looks upscale but scratches easily and shows fingerprints. Matte or textured finishes hide wear better. If you’re wrapping trim pieces, lightly sand glossy surfaces with 400-grit sandpaper and wipe with isopropyl alcohol so vinyl adhesive bonds properly.
Metal accents, aluminum, brushed steel, or faux chrome, work well on vents, door handles, and speaker grilles. Real metal adds weight, so aftermarket accent kits usually use ABS plastic with a metallic finish. That’s fine for aesthetics, but don’t expect the same cool-to-the-touch feel as genuine aluminum.
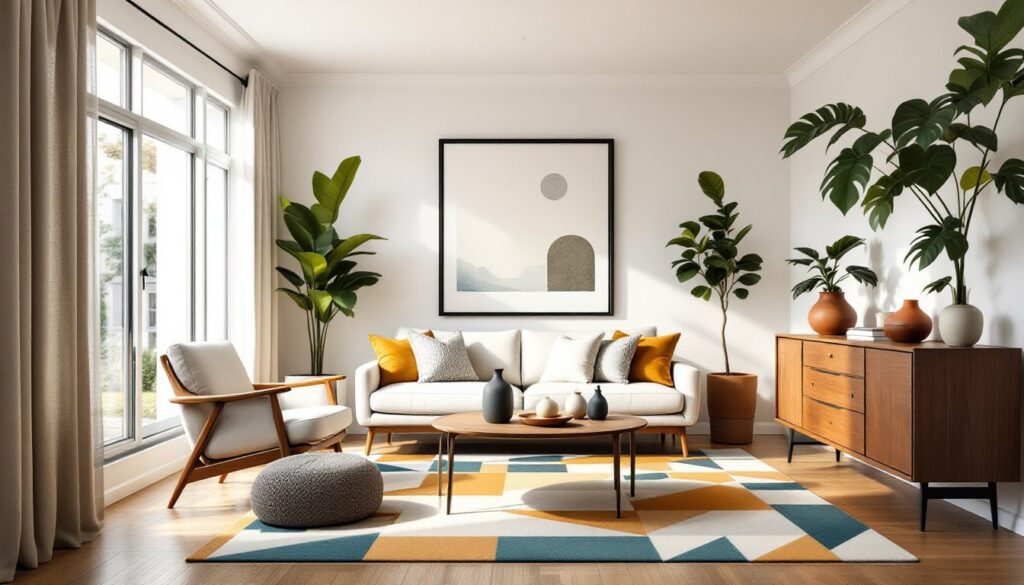
When selecting materials, match the existing texture family. Pairing carbon-look vinyl with wood-grain trim rarely works, it clashes in style. Stick to one accent material and let it repeat across three or four touchpoints (shift knob, door pulls, console lid) for cohesion, much like the approach professional designers use for contemporary furniture in residential spaces.
DIY Upgrades to Elevate Your Car’s Interior
Start with the simplest, highest-impact projects. Here are upgrades most DIYers can complete in a few hours with basic hand tools.
Replace the steering wheel cover. A worn steering wheel telegraphs age. Leather or microfiber wrap kits include pre-cut panels and waxed thread. You’ll need a curved upholstery needle and patience, stitching takes 45–60 minutes, but the result looks factory. If you go with a slip-on cover, choose one with a non-slip silicone lining: cheap elastic covers rotate under your hands.
Swap floor mats and cargo liners. Measure your footwells before ordering. OEM-fit mats (often called “1st row” and “2nd row”) align with factory mounting points. Generic mats slide around and bunch under pedals, a legitimate safety hazard. For cargo areas, tri-fold liners protect against spills and make cleanup easier than vacuuming carpet.
Add ambient LED lighting. Self-adhesive LED strips with 12V cigarette-lighter adapters install in under 30 minutes. Run strips under seats or along door sills, securing them with cable ties or adhesive clips every 8–10 inches. Avoid placing LEDs where they’ll reflect in windows or mirrors. Use a dimmer switch or app-controlled kit so you can adjust brightness, full intensity is distracting at night.
Install a dash cam with interior mount. A dual-channel dash cam records both road and cabin. Hardwire it to your fuse box using an add-a-fuse tap (typically on a circuit rated 5–10A, like the cigarette lighter or radio memory). This keeps the windshield and 12V ports clear. Run wiring under the headliner and A-pillar trim: disconnect the battery before working near the fuse box.
Upgrade door sill guards and kick plates. Aluminum or stainless-steel guards protect paint and add a finished look when doors open. Most attach with 3M VHB tape. Clean the surface with isopropyl alcohol, press firmly, and let cure for 24 hours before slamming doors.
Reupholster or dye faded panels. If seats or door panels are sun-faded, vinyl/leather dye kits (like those from Dupli-Color or Rust-Oleum) can restore color. Surface prep is critical: clean with a degreaser, scuff lightly with a Scotch-Brite pad, then apply dye in thin, even coats. Work in a ventilated garage and wear a respirator rated for organic vapors (3M 6000 series or equivalent), these dyes contain solvents.
Organize with modular inserts. Center console organizers, seat-back pockets, and trunk dividers corral gear without permanent modifications. Look for designs that snap into cupholders or clip to seat tracks. Drawing from concepts seen in home design ideas, use vertical dividers to separate small items like charging cables, sunglasses, and first-aid kits, same logic as drawer organizers in a kitchen.
Color Schemes and Aesthetic Choices for Vehicle Interiors
Factory interiors tend toward neutral palettes, black, gray, beige, or tan, because they age gracefully and appeal to resale markets. Custom color work should follow the same rule: choose a dominant neutral and one accent color.
Monochromatic schemes (all black, charcoal seats with black carpet and dark gray dash) look sleek but can feel cave-like in small cars. Break it up with contrast stitching, white or red thread on black leather seats adds definition without overwhelming the space.
Two-tone combinations work well when the lighter color is on horizontal surfaces (seat cushions, door armrests) and the darker on verticals (seatbacks, door uppers). This mimics natural light distribution and hides wear on high-contact areas.
Bold accent colors, red, blue, orange, should appear in no more than 10–15% of visible surfaces. Use them on seat piping, seatbelt covers, or floor mat binding. Too much saturation fatigues the eye on long drives.
If you’re wrapping or painting trim, test samples in the car first. Paint chips and vinyl swatches look different under dashboard lighting than they do under fluorescent store lights. Park in your driveway at midday and again at dusk to see how colors shift.
For a cohesive look, match your interior updates to exterior themes. A blacked-out exterior pairs naturally with dark interiors and silver accents. A car with chrome bumpers and trim might call for tan leather and wood-look accents. Much like advice found in resources on modern living spaces, consistency in design language ties individual choices into a unified whole.
Maximizing Comfort and Functionality in Your Car
Style matters, but comfort and utility determine whether you actually enjoy the space. Here’s how to balance both.
Upgrade seat cushions and lumbar support. Aftermarket foam or gel cushions reduce fatigue on long drives. Memory foam cushions (typically 2–3 inches thick) conform to your shape but can trap heat, look for versions with gel-infused foam or ventilated covers. Lumbar pillows with adjustable straps fit most seats and help maintain posture.
Control temperature and airflow. Seat covers in breathable materials, mesh, perforated leather, or moisture-wicking fabric, improve comfort in summer. In winter, heated seat covers plug into the 12V outlet and draw 30–45W: that’s about the same as a phone charger, so they won’t drain the battery. Check the cover’s temperature range, cheaper models can overheat or short out.
Reduce noise. Factory sound deadening varies widely. Adding Dynamat or similar butyl-rubber mats to door panels, floor, and trunk reduces road noise by 3–5 dB. You’ll need to remove interior panels (door cards pop off with a trim tool: floor requires pulling seats). Apply mats to bare metal, pressing firmly with a roller to eliminate air bubbles. This is a half-day project per door.
Improve storage and organization. Floating console organizers sit between front seats and add cupholders or phone slots without drilling. Cargo nets or bungee systems in the trunk keep groceries and gear from sliding. If you haul tools or sports equipment, consider a trunk organizer with rigid sides, collapsible versions are easier to store when not in use.
Add USB charging and power outlets. Older cars have one or two 12V outlets: newer models may have USB-A ports, but USB-C fast charging is rare. Plug-in adapters work, but hardwired solutions are cleaner. Flush-mount USB panels fit into unused switch blanks or ashtray cavities. You’ll tap into a fused 12V circuit (radio or accessory) and run wires behind the dash. If you’re not comfortable splicing into vehicle wiring, this is a good job for a mobile electronics installer, expect to pay $80–150 for parts and labor.
Safety and visibility upgrades. Blind-spot mirrors (convex stick-ons) reduce blind spots without replacing OEM mirrors. Interior rearview mirrors with auto-dimming and integrated dash cams are direct replacements on most vehicles and mount with the same ball-and-socket bracket. Always wear safety glasses when working under the dash or removing panels, spring clips can pop loose and metal edges are sharp.
Conclusion
Interior car design isn’t about reinventing the cabin, it’s about refining what’s already there. With the right materials, a coherent color plan, and a few well-chosen upgrades, any vehicle can feel more comfortable and personalized. Focus on high-touch surfaces first, plan changes around your actual driving habits, and don’t skip surface prep. Most DIY interior projects require patience more than skill, and the result is a space that feels like yours every time you turn the key.