
Built-in home office furniture offers more than just storage, it creates a tailored workspace that maximizes every square foot while boosting property value. Unlike freestanding desks and shelving units that never quite fit right, built-ins integrate seamlessly with a room’s architecture, turning awkward alcoves and blank walls into functional workstations. Whether tackling the project solo or hiring a finish carpenter, understanding the planning process, material choices, and realistic costs helps homeowners make informed decisions that match their skill level and budget.
Table of Contents
ToggleKey Takeaways
- A home office built in maximizes space efficiency and increases property resale value by utilizing vertical and wall-to-wall surfaces that freestanding furniture cannot reach.
- Proper planning for electrical outlets, window placement, and doorway clearances prevents costly mistakes before construction of your home office built in begins.
- Desktop height should typically range from 29 to 30 inches for standard typing, though taller individuals may prefer 32-inch surfaces depending on chair height and personal preference.
- DIY installation requires intermediate to advanced carpentry skills, $800 to $1,500 in tool investment, and 40 to 60 hours for a basic 8-foot built-in desk system.
- Professional finish carpenters cost $50 to $100 per hour, with complete installations ranging from $2,000 to $8,000, but provide insurance coverage, warranties, and expertise solving structural challenges.
- Material costs average $480 to $950 for a basic project using birch plywood and poplar face frames, while premium upgrades like soft-close drawers and built-in lighting enhance functionality without major budget increases.
Why Built-In Home Office Furniture Is Worth the Investment
Built-in cabinetry delivers superior space efficiency compared to modular furniture. Custom units extend floor-to-ceiling and wall-to-wall, utilizing vertical space that freestanding pieces can’t reach. This approach eliminates gaps where dust accumulates and creates a cohesive look that off-the-shelf furniture rarely achieves.
Home resale value typically increases with quality built-ins, especially in areas where dedicated home offices have become standard. Appraisers recognize permanent improvements as value-adds, whereas movable furniture doesn’t factor into property assessments.
Stability matters for equipment-heavy workstations. Built-in desks anchored to wall studs support multiple monitors, printers, and heavy reference books without wobbling. Upper cabinets secured to studs with 3-inch cabinet screws hold substantial weight, critical when storing reams of paper, binders, or technical equipment.
The customization factor addresses specific workflow needs. A graphic designer might need shallow drawers for flat file storage, while an accountant benefits from deeper drawers for hanging file folders. Off-the-shelf units force users to adapt their workflow to the furniture’s limitations.
Planning Your Built-In Home Office Layout
Start by identifying electrical requirements before finalizing any layout. Most building codes require outlets every 12 feet along walls, but home offices demand more. Plan for outlets at desk height (18 inches above the work surface) to avoid crawling under desks to plug in devices. Dedicated circuits for computers and printers prevent tripped breakers during peak usage.
Window placement dictates desk orientation. Natural light reduces eye strain, but glare on computer screens creates visibility problems. Position monitors perpendicular to windows rather than facing them directly. For rooms with south-facing windows, consider mounting upper cabinets that double as light baffles.
Doorway clearances affect furniture depth. The International Residential Code (IRC) requires a minimum 32-inch clear width for doorways. Built-in cabinets projecting more than 12 inches from the wall can narrow pathways and create traffic flow problems in smaller rooms.
Measuring Your Space and Determining Functionality
Accurate measurements prevent costly mistakes. Measure wall lengths at multiple heights, older homes rarely have perfectly straight walls. Note baseboard thickness (typically 3/4 inch), crown molding profiles, and any wall irregularities like outlets, switches, or HVAC vents.
Desktop height standards sit at 29 to 30 inches for typing surfaces, but this varies by user preference and chair height. Taller individuals often prefer 32-inch desktops, while adjustable-height desk frames accommodate multiple users.
Depth considerations balance function with room size. Standard desk depth runs 24 to 30 inches, enough for a monitor, keyboard, and some workspace. Deeper countertops (up to 36 inches) accommodate dual-monitor setups but eat into floor space in compact rooms.
Upper cabinet height depends on ceiling height and user reach. Most residential installations place upper cabinet bottoms 18 to 24 inches above the desktop, keeping frequently accessed items within reach without blocking sightlines. Homeowners following woodworking tutorials often adjust these dimensions based on their specific storage needs.
Popular Built-In Home Office Design Ideas
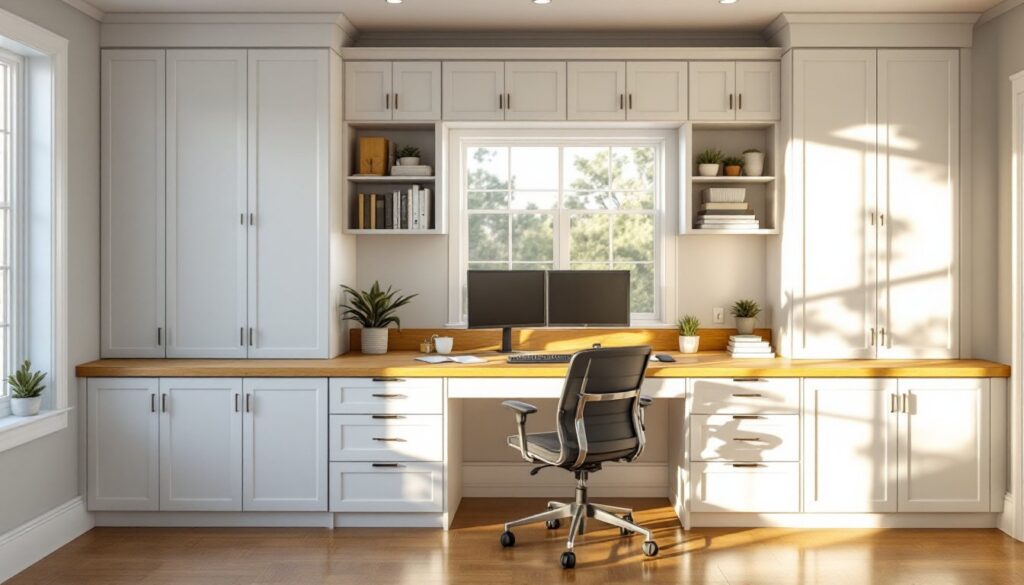
Full-wall desk systems work well in dedicated office rooms. These span entire walls with continuous worksurfaces at desktop height, upper cabinets for storage, and open shelving for display. The look resembles library millwork and provides ample workspace for spreading out documents.
Alcove workstations convert underutilized nooks into functional offices. Measure the alcove precisely, these spaces often have irregular dimensions. Build the desk unit 1/4 inch narrower than the opening to allow for scribing and fitting. Add a face frame that overlaps the opening by 1 inch on each side for a finished appearance.
Corner configurations maximize L-shaped spaces but require careful planning for diagonal corners. Use a lazy Susan cabinet mechanism for corner base cabinets, or install pull-out shelves that provide access to deep corner areas. Many professionals recognize creative built-in storage ideas that address these challenging spaces.
Murphy desk systems fold up when not in use, ideal for multipurpose rooms. Quality hardware supports 50 to 75 pounds when deployed. Reinforce the mounting area with blocking between studs for hardware attachment points. These work best for laptop users rather than desktop computers with multiple peripherals.
Floating desk systems attach directly to wall studs without base cabinets below, creating an airy appearance and easy floor cleaning. Use 2×6 or 2×8 lumber for the desk frame, secured to studs with 1/2-inch lag bolts. This approach works well for minimalist designs but offers less storage than floor-mounted cabinetry.
Materials and Finishes for Built-In Office Cabinetry
Cabinet-grade plywood (3/4 inch thick) serves as the workhorse material for most built-in projects. Birch plywood offers consistent color and smooth grain for painted finishes, while oak or maple plywood works better for stained projects. Avoid construction-grade plywood, it has voids and uneven veneers that telegraph through paint.
MDF (medium-density fiberboard) machines cleanly for painted applications and costs less than plywood. It’s heavier and more prone to moisture damage, so avoid using it in basement offices or areas with humidity concerns. 3/4-inch MDF works well for shelves spanning up to 32 inches without noticeable sagging.
Hardwood face frames (typically 3/4-inch thick by 1-1/2 to 2 inches wide) made from poplar, oak, or maple add structural rigidity and provide better screw-holding at door hinges. They also hide plywood edges for cleaner finished appearance.
Desktop materials range from budget to premium. Butcher block countertops provide warmth and durability but require periodic oiling. Melamine-faced particleboard offers affordability and moisture resistance for $20 to $30 per 4×8 sheet. Solid wood tops like walnut or cherry deliver high-end aesthetics but move with humidity changes, factor in seasonal wood movement when securing them.
Finish options dramatically affect durability. Pre-catalyzed lacquer provides professional results but requires spray equipment. Water-based polyurethane works for brush applications with minimal odor. For painted cabinets, oil-based primer followed by acrylic latex paint delivers durable, washable surfaces. Sand between coats with 220-grit sandpaper for smooth finishes.
DIY vs. Professional Installation: What to Consider
Skill assessment determines project feasibility. Built-ins require intermediate to advanced carpentry skills, cutting precise miter joints, scribing to uneven walls, and installing European-style hinges. DIYers comfortable with home repair projects and owning a table saw, miter saw, and drill can tackle simpler designs.
Tool requirements add up quickly. Essential tools include a table saw for ripping plywood, miter saw for trim cuts, drill/driver for assembly, orbital sander, and a level. A track saw provides an alternative to a table saw for breaking down sheet goods with greater precision and safety. Budget $800 to $1,500 for tools if starting from scratch.
Time commitment often exceeds expectations. A basic 8-foot built-in desk system takes experienced DIYers 40 to 60 hours from planning through final finishing. This includes material selection, cutting, assembly, installation, sanding, and finishing. Complex designs with multiple cabinets and intricate trim details can double that timeline.
Professional installation costs vary by region and complexity. Finish carpenters charge $50 to $100 per hour in most markets. Complete built-in office installations range from $2,000 to $8,000 depending on size, materials, and finish details. Professionals provide benefits DIYers can’t match: insurance coverage, warranty on workmanship, and decades of experience solving installation challenges.
Structural concerns warrant professional consultation. Load-bearing walls require engineered headers if adding alcoves or removing sections. Licensed contractors understand local building codes, pull necessary permits, and know when to involve structural engineers. Attempting structural modifications without proper knowledge risks serious safety issues and code violations.
Budget Breakdown and Cost Considerations
Materials typically consume 40-60% of total project costs. A basic 8-foot built-in using birch plywood and poplar face frames runs approximately:
- Plywood (3/4-inch, three sheets): $180-$240
- Face frame lumber: $40-$60
- Hardware (hinges, drawer slides, handles): $100-$200
- Desktop material: $80-$300 (depending on material choice)
- Finishing supplies (primer, paint, sandpaper): $50-$100
- Miscellaneous (screws, wood glue, caulk): $30-$50
Total material cost: $480-$950 for a mid-range project.
Labor represents the largest cost variable. DIY projects save labor expenses but require significant time investment. Professional installation adds $1,500 to $5,000 depending on complexity, regional labor rates, and finish details like crown molding or decorative panels.
Hidden costs catch many homeowners off guard. Electrical work (adding outlets or circuits) requires a licensed electrician in most jurisdictions, budget $200 to $500 for basic additions. Painting or wallpapering behind built-ins adds another $150 to $400. Many projects reveal wall repairs needed once furniture moves out.
Cost-saving strategies include using pre-finished plywood that eliminates painting, choosing simple overlay doors instead of inset styles that require precision fitting, and installing base cabinets only (skipping uppers). Stock cabinet components from home centers cost less than custom-cut plywood, though they limit design flexibility.
Premium upgrades that boost functionality include soft-close drawer slides ($15-$30 per pair vs. $5 for standard slides), built-in lighting (LED strips at $20-$40 per 16 feet), and cable management grommets ($5-$15 each). These details enhance daily use and professional appearance without dramatically inflating budgets.