
Converting a van into a livable space isn’t just about throwing in a mattress and calling it done. Thoughtful van interior design balances the constraints of a compact footprint with the demands of daily living, cooking, sleeping, working, and storing gear. Whether building out a Sprinter, Transit, or ProMaster, the decisions made during the design phase determine whether the space feels cramped and chaotic or surprisingly spacious and livable. This guide walks through the essential planning, material choices, storage strategies, and finishing touches that transform a cargo van into a functional, comfortable home on wheels.
Table of Contents
ToggleKey Takeaways
- Thoughtful van interior design balances compact space constraints with daily living demands by optimizing layout, materials, and storage before construction begins.
- Smart storage solutions like under-bed drawers, overhead cabinets, and multipurpose furniture maximize every square foot while maintaining visual breathing room.
- Proper lighting design using 12-volt LED strips with dimmer switches and layered zones enhances functionality while conserving battery power in your mobile home.
- Light color schemes, monochromatic palettes, and texture layering make van interiors feel spacious and welcoming without visual clutter.
- Material choices like Baltic birch plywood, vinyl plank flooring, and sealed countertops determine durability, moisture resistance, and how well your van interior withstands mobile living.
- Strategic placement of core zones—sleeping, cooking, living, and storage—with attention to traffic flow prevents the design frustrations that make vans feel cramped within days.
Why Van Interior Design Matters for Modern Van Life
A poorly designed van interior creates frustration within days. Inefficient layouts force occupants to crawl over furniture to reach storage, insufficient lighting makes evening tasks difficult, and poor material choices lead to moisture buildup, mold, and premature wear. Good design solves these problems before they start.
Van life demands more from every square foot than traditional housing. The same 60-80 square feet must function as bedroom, kitchen, living room, office, and storage. Without deliberate planning, the space quickly becomes cluttered and unlivable. Strategic design maximizes usable area, improves workflow between zones, and creates visual breathing room through smart color choices and layout decisions.
Comfort and safety also depend on design choices. Properly secured cabinetry and furniture prevent injuries during sudden stops. Adequate ventilation prevents condensation damage. Fire-resistant materials near cooking areas reduce risk. These aren’t optional considerations, they’re fundamental requirements that separate a well-built van from a rolling hazard. Taking time upfront to plan the interior pays dividends in daily usability and long-term durability.
Planning Your Van Layout for Maximum Functionality
Start by measuring the interior dimensions accurately. Account for wheel wells, ribs in the van walls, and ceiling curves. Most cargo vans have 60-70 inches of interior height at the center and around 120-140 inches of cargo length behind the driver’s seat. Wheel wells typically intrude 10-12 inches into the floor space on each side.
Sketch multiple layout options before committing. Consider traffic flow, the path taken when moving from the driver’s seat to the bed or from storage to the cooking area. Avoid designs that require climbing over the bed to access storage or squeezing past furniture to reach essential items. Place frequently used items in easy-reach zones and reserve awkward spaces (like above wheel wells) for less-accessed storage.
Decide whether the layout will be fixed or convertible. Fixed layouts with permanent furniture maximize structural integrity and simplify construction. Convertible layouts, where the bed folds into a couch or table, save space but add complexity, cost, and potential failure points. For most van dwellers, a simple fixed layout proves more durable and practical than complex multi-function furniture.
Essential Design Zones Every Van Needs
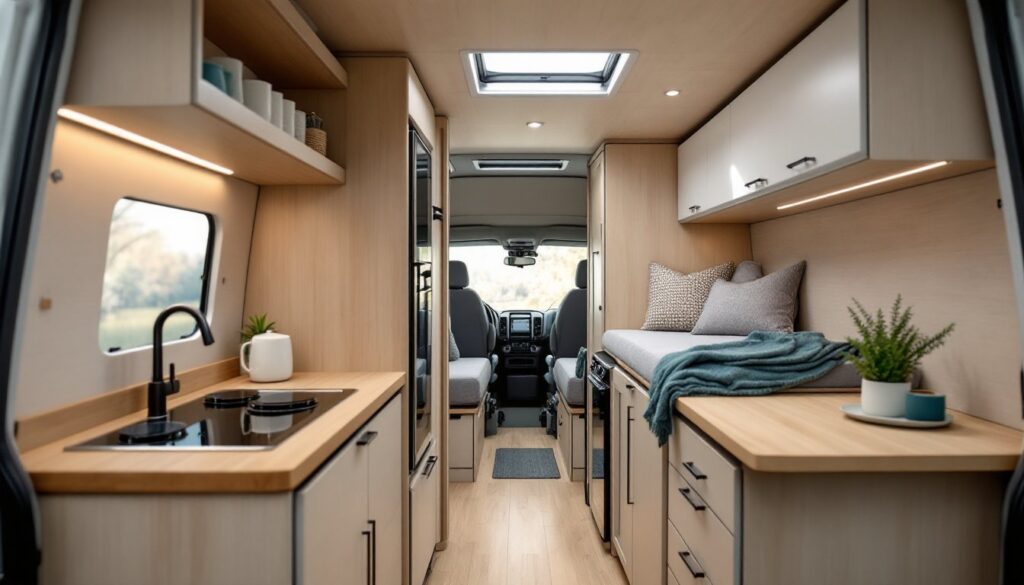
Every functional van interior includes four core zones: sleeping, cooking, storage, and living/working space. The sleeping zone typically occupies the rear or one side, with bed platforms sized around 48 inches wide for solo travelers or 60-72 inches for couples. Elevating the bed platform 18-24 inches above the floor creates valuable storage underneath.
The cooking zone requires 24-36 inches of counter space, room for a portable stove or fixed cooktop, and access to a water source. Mounting this area on the sliding door side provides ventilation and outdoor cooking options. Keep this zone away from the sleeping area to prevent cooking odors from saturating bedding.
The living/working zone might be a fold-down table, a fixed desk, or simply floor space with cushions. This area needs proximity to windows for natural light and electrical outlets for devices. The storage zone isn’t one specific location but integrated throughout, under beds, in overhead cabinets, and in vertical spaces between ribs.
Choosing the Right Materials and Finishes
Material selection directly impacts weight, durability, moisture resistance, and aesthetics. Baltic birch plywood remains the standard choice for van cabinetry, it’s lighter than pine, more stable than standard plywood, and available in 1/2-inch and 3/4-inch thicknesses. A full van build typically requires 6-8 sheets of 4×8-foot plywood.
For wall paneling, 1/4-inch plywood or tongue-and-groove pine provides a finished look without excessive weight. Some builders use vinyl composite panels designed for RVs, these resist moisture better than wood but lack the warmth and customization options of natural materials. Whatever wall covering is chosen, install it over 1-inch rigid foam insulation (like XPS or polyiso) to manage temperature and reduce condensation.
Floor material must withstand dirt, moisture, and foot traffic. Vinyl plank flooring offers the best combination of durability, water resistance, and ease of installation. Lay it over a 1/2-inch plywood subfloor that’s been sealed and insulated from the van’s metal floor. Avoid carpet, it traps moisture, dirt, and odors in a space that’s already prone to all three.
For countertops, consider butcher block, laminate, or marine-grade plywood sealed with epoxy. Butcher block looks great and can be sanded and refinished, but requires regular oiling. Laminate resists moisture and cleans easily but can delaminate in high-humidity environments. Marine plywood with multiple coats of epoxy provides excellent moisture resistance at moderate cost. When browsing design ideas for compact spaces, note how material finishes affect perceived spaciousness, lighter woods and smooth surfaces reflect more light.
Smart Storage Solutions for Small Spaces
Vertical space is the most underutilized resource in van builds. Install overhead cabinets along the ceiling, but keep them shallow (6-8 inches deep) to avoid a claustrophobic feel. Use these for lightweight, infrequently accessed items, extra bedding, off-season clothing, or bulky gear.
Under-bed storage should be organized with sliding drawers or bins on rails rather than open cavities. Drawers prevent items from shifting during travel and make it easy to access specific gear without unpacking everything. Build drawers from 1/2-inch plywood with drawer slides rated for at least 75 pounds per side. Full-extension slides cost more but provide complete access to the drawer contents.
Magnetic strips, hanging organizers, and wall-mounted racks make use of awkward wall spaces. Install magnetic knife strips for kitchen tools, tension rods with S-hooks for hanging utensils, and fold-down shelves that stow flat when not in use. The backs of cabinet doors can hold spice racks, paper towel holders, or small baskets.
Avoid filling every available space with storage. Leave some open wall area and clear floor space, visual emptiness makes the van feel larger and reduces the sense of clutter. Choose multipurpose items: a storage ottoman serves as both seating and hidden storage: a bed platform with built-in drawers eliminates the need for a separate dresser. Practical small-space organization concepts often work well in van interiors when adapted for mobile use.
Lighting Design to Enhance Your Van Interior
Lighting sets the mood and functionality of the space. Most van builders rely on 12-volt LED strip lights and puck lights powered by the vehicle’s auxiliary battery system. LED strips mounted under cabinets provide task lighting for cooking and working. Install warm white LEDs (2700-3000K) for general lighting and daylight LEDs (5000K) for task areas requiring focus.
Layer the lighting with multiple zones controlled by separate switches. A reading light near the bed, overhead ambient lighting, and dedicated task lighting in the kitchen allow occupants to illuminate only the needed areas. This conserves battery power and prevents the harsh, flat lighting that makes small spaces feel institutional.
Maximize natural light during the day by adding windows or skylights if the budget allows. A 14×14-inch roof vent with a fan (like a MaxxAir or Fantastic Fan) provides ventilation and light while helping manage moisture. If cutting into the van’s roof isn’t an option, keep window areas unobstructed and use light-colored window coverings that can be fully opened during the day.
Install dimmer switches on primary lights. Dimming capability extends battery life, allows adjustment based on time of day, and prevents harsh lighting before bedtime. Most 12-volt LED systems work with standard PWM dimmers designed for automotive use. Wire lighting circuits with 14-gauge wire for runs up to 15 feet to minimize voltage drop.
Color Schemes and Decor That Make Your Van Feel Like Home
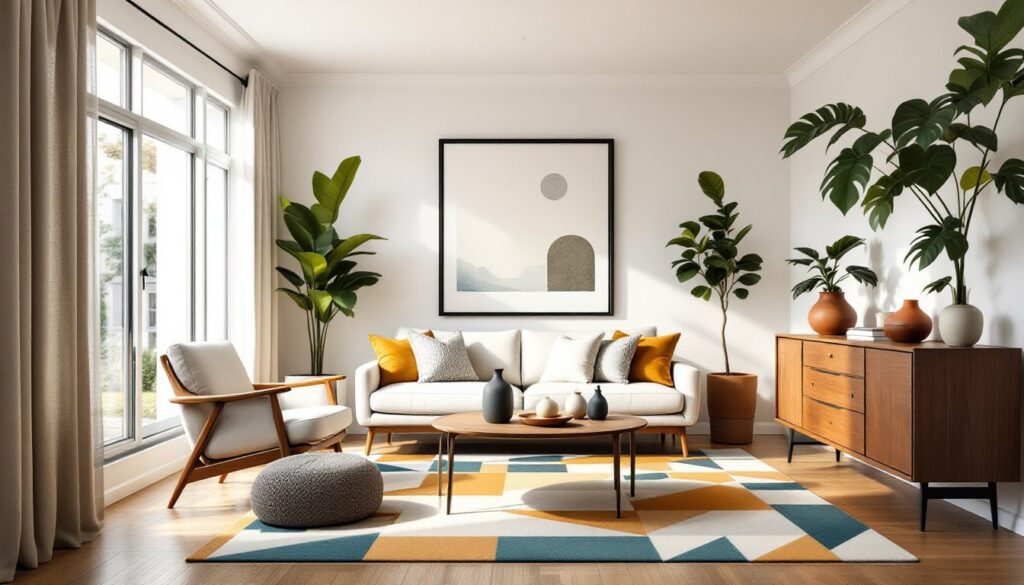
Light colors make small spaces feel larger. White, light gray, pale blue, and natural wood tones reflect light and create an open, airy feeling. Dark colors absorb light and make the space feel enclosed, reserve them for small accent areas rather than large surfaces.
A monochromatic or two-color scheme simplifies the space visually. Too many competing colors create visual clutter in a small area. Choose one primary color (often white or light wood) and one accent color for textiles, cabinet hardware, or small decorative elements. This creates cohesion without monotony.
Texture adds interest without requiring color variety. Combine smooth painted surfaces with natural wood grain, woven textiles, and metal accents. A linen curtain, wool throw blanket, and cotton cushions introduce warmth and softness that balance the hard surfaces of plywood and metal. Many home design resources showcase texture-layering techniques that translate well to compact interiors.
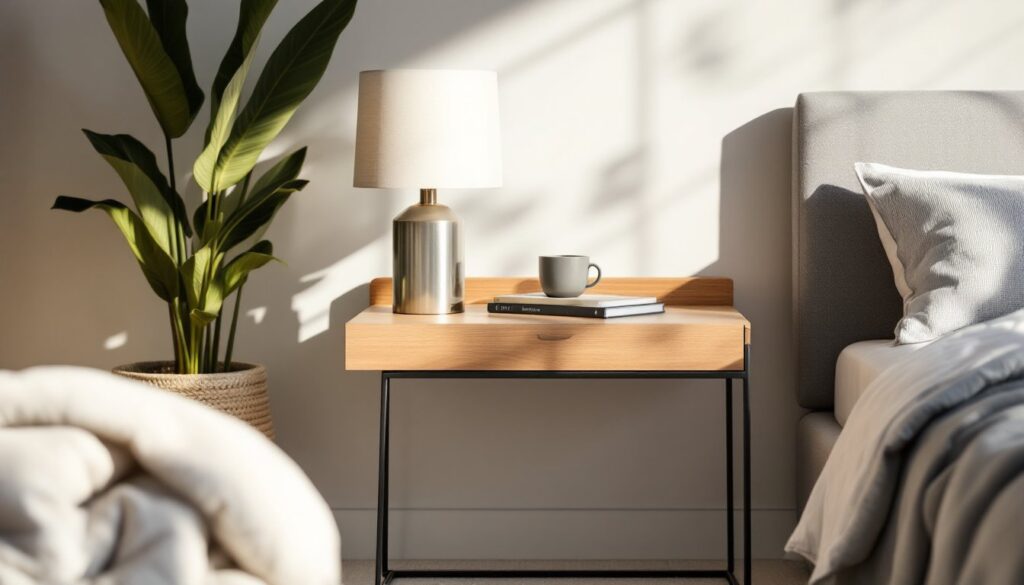
Personalize the space with a few meaningful items rather than cluttering surfaces with decor. A single piece of art, a small plant in a secure holder, or a favorite mug displayed on a shelf makes the space feel lived-in without overwhelming it. Avoid overdecorating, every item added takes up physical and visual space that’s already limited. Choose items that serve dual purposes: a beautiful cutting board that’s also functional, a decorative basket that holds frequently used items, or a patterned rug that defines the living area while hiding dirt.